Paving is an essential part of infrastructure construction, whether for roads, parking lots, or driveways. The paving process involves various stages, each requiring careful planning, quality materials, and skilled labor to ensure a smooth and durable surface. In this article, we will explore the step-by-step process of asphalt pavement installation, from initial planning to the final inspection. This guide will provide a detailed look at each stage of the paving project.
1. Initial Planning and Design
Objective: Before any physical work begins, a thorough planning and design phase must take place to determine the scope of the project, its requirements, and any special considerations.
Key Actions:
- Site Evaluation: Survey the site to assess the condition of the ground, soil type, drainage needs, and existing structures. This helps in identifying potential challenges.
- Design Layout: Create a design that defines the area to be paved, including dimensions, slope, and grading requirements to facilitate proper drainage.
- Material Selection: Decide on the type of asphalt mix based on traffic loads, weather conditions, and the purpose of the pavement. Different mixtures may be needed for roads, parking lots, or residential driveways.
- Permits and Approvals: In many cases, permits are required before starting any paving work. Ensure all legal and regulatory approvals are obtained before proceeding.
2. Site Preparation
Objective: Proper site preparation ensures the foundation is stable and able to support the asphalt. This is one of the most crucial steps in the paving process.
Key Actions:
- Clearing the Area: Remove any vegetation, debris, and old pavement. This creates a clean working space and allows for proper drainage.
- Excavation and Grading: Excavate the area to the required depth, removing soil to create a level surface. Grading the surface ensures proper water runoff, preventing pooling or flooding.
- Compaction: Compact the soil using a roller to create a firm base. Proper compaction is essential for preventing settling and cracks in the asphalt later on.
3. Base Layer Installation
Objective: The base layer provides a solid foundation for the asphalt, ensuring that the pavement has the strength and stability to withstand traffic loads.
Key Actions:
- Base Material Selection: Typically, a crushed stone base or crushed gravel is used for the foundation. This material should be durable and compact well.
- Layer Thickness: The thickness of the base layer is determined by factors like traffic load and soil conditions, usually ranging from 4 to 8 inches.
- Compaction: After spreading the base material, it must be compacted again to create a solid and stable base layer. This is done with heavy equipment like a vibratory roller.
4. Binder Layer Installation
Objective: The binder layer, or intermediate layer, helps bond the base layer to the surface layer and adds strength to the overall pavement structure.
Key Actions:
- Binder Material: A mixture of asphalt and aggregate is applied as the binder layer. This layer typically has a thicker consistency than the surface layer.
- Layer Thickness: The binder layer is usually between 2 to 4 inches thick, depending on the expected traffic load and other factors.
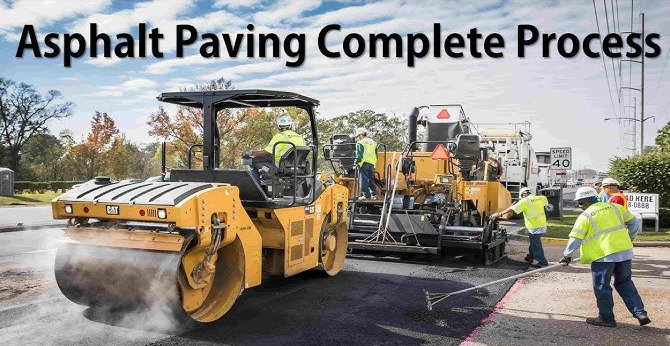
- Paving and Compaction: The binder layer is spread evenly using an asphalt paver, and then compacted to ensure proper bonding between the base and surface layers.
5. Surface Layer Installation
Objective: The surface layer provides the smooth, durable, and wear-resistant top layer of the pavement, which will be exposed to traffic and weather conditions.
Key Actions:
- Surface Material: A fine-grained mixture of asphalt and aggregates is selected for the surface layer to provide a smooth and durable finish.
- Layer Thickness: The surface layer is generally the thinnest layer, ranging from 1.5 to 3 inches, depending on the application.
- Paving: The asphalt mixture is spread evenly over the binder layer using a paver. The paver ensures the correct thickness and smoothness.
- Compaction: After the surface layer is applied, it is compacted immediately while it is still hot, ensuring that it bonds well and provides a smooth finish.
6. Cooling and Curing
Objective: After the asphalt has been laid and compacted, it needs time to cool and cure to ensure its durability and strength.
Key Actions:
- Cooling Process: Asphalt needs to cool naturally to avoid premature cracking. Cooling time depends on the weather and thickness of the layers, typically taking several hours.
- Curing: Although asphalt hardens quickly after installation, full curing can take weeks. During this period, the asphalt will reach its optimal strength and durability.
- Traffic Restrictions: During the curing phase, traffic should be restricted to prevent damage to the fresh pavement. Temporary barriers or signs may be used to keep vehicles off the newly paved surface.
7. Final Inspection and Quality Control
Objective: Ensure that the pavement meets the required standards for strength, smoothness, and durability. A final inspection is necessary before opening the road or parking lot to traffic.
Key Actions:
- Visual Inspection: Check for visible defects, such as cracks, potholes, or uneven surfaces.
- Smoothness Test: A smooth surface is essential for driving comfort and safety. A “sag and bump” test is often used to ensure the asphalt is level.
- Core Samples: In some cases, core samples may be taken from the surface to assess the thickness, compaction, and composition of the pavement layers.
- Compaction Test: Conduct a test to ensure the asphalt is compacted to the correct density, ensuring strength and resistance to cracking.
8. Striping and Finishing Touches
Objective: After the paving is completed, final touches like striping, signage, and any necessary repairs are added to ensure the area is functional and visually appealing.
Key Actions:
- Line Striping: Parking lots, roads, and driveways often require line striping for parking spaces, lanes, and other markings. These lines are painted with durable, weather-resistant paint.
- Signage and Barriers: Install any required signs, such as speed limits, directional signs, or stop signs. Barriers may also be put in place to direct traffic flow.
- Sealcoating (optional): For additional protection, a layer of sealcoat may be applied to the surface. This is typically done for parking lots to protect against weather, oil, and chemical spills.
9. Ongoing Maintenance
Objective: Ensure the longevity of the pavement by performing regular maintenance to address wear and tear.
Key Actions:
- Regular Inspections: Periodically inspect the pavement for cracks, potholes, or signs of deterioration.
- Crack Sealing: Small cracks can be sealed to prevent water from infiltrating the surface and causing further damage.
- Resurfacing: Depending on the traffic load, resurfacing may be needed every 10-15 years to maintain the pavement’s integrity.
Conclusion: The Pavement Process from Start to Finish
The paving process is a complex and detailed procedure that requires precision, quality materials, and skilled labor. From the initial planning stages to the final inspection and maintenance, each step plays a crucial role in ensuring the durability, safety, and functionality of the paved surface. Whether it’s for a highway, a residential driveway, or a commercial parking lot, understanding each step of the process helps ensure that the finished pavement meets the necessary standards for performance and longevity.
By following these steps, contractors can ensure that the asphalt pavement is durable, safe, and cost-effective for years to come.


